Last week, I told you about the major increase in traffic to my blog. This hasn’t always been the case. In fact, traffic to my blog has always been really low. Implementing quite a few new strategies in a bunch of areas over the course of a couple months helped dramatically. But, I saw the biggest gains from Pinterest from doing very little more than I had been previously. A few minor tweaks, and Pinterest was my top referring traffic source by far. In my previous post, I shared a few of the ways I changed how I was using Pinterest. Today though, I wanted to give you a more detailed crash course, if you will, on the best ways to increase blog traffic with Pinterest.
Set aside some time today to start your Pinterest account, or update it, according to the information you find in this article. As always, if you run into an issue or are unsure about a step, don’t hesitate to comment or contact me directly! I’m here to help 🙂

A Crash Course to Increase Blog Traffic with Pinterest
Set Up Your Pinterest Account
I choose to use one Pinterest Account for my personal and blogging needs. It seems appropriate because my blog is all about family, parenting, and kids. All my personal pins will fit my target audience.
From my understanding, you will need a Business Account in order to complete some of the activities toward the end of this post. A Pinterest Business Account is free and offers analytics. For those reasons, I recommend this.
As you set up your account, consider key words. My Pinterest name shows up as Ivy B / Mom Blogger / SAHM, plus… and my description includes key words that I feel my target audience might search for. Since my blog name is SAHM, plus … it already hosts a key word for me 🙂

When you’re finished naming and describing your Pinterest account, it’s time to verify or confirm your website. Follow the instructions from Pinterest (found here) to verify your website.
Now, begin creating some relevant boards! Create as many different boards as you can, giving each appropriate descriptions filled with key words, and place them into categories. I find it important to have several boards that can host similar content. For example, I have 2 boards for parents and have them named Parenting and Parents. Then I have two other boards called Encouragement for Moms and Encourage Your Kids. All 4 of these can host some similar content. This will be useful for re-pinning later!
[tweetthis]Ready to rock Pinterest & increase blog traffic? You need these tips![/tweetthis]
Making Pins to Increase Blog Traffic with Pinterest
Using images (or several) may help to tell a visual story to explain your blog post. If you don’t have your own images, consider stock photos (there are tons of places you can get free images). If you’re making an infographic, images may not be necessary.
Using Canva, PicMonkey, or other photo editing software, it’s time to make a pinnable image. Keep in mind the following:
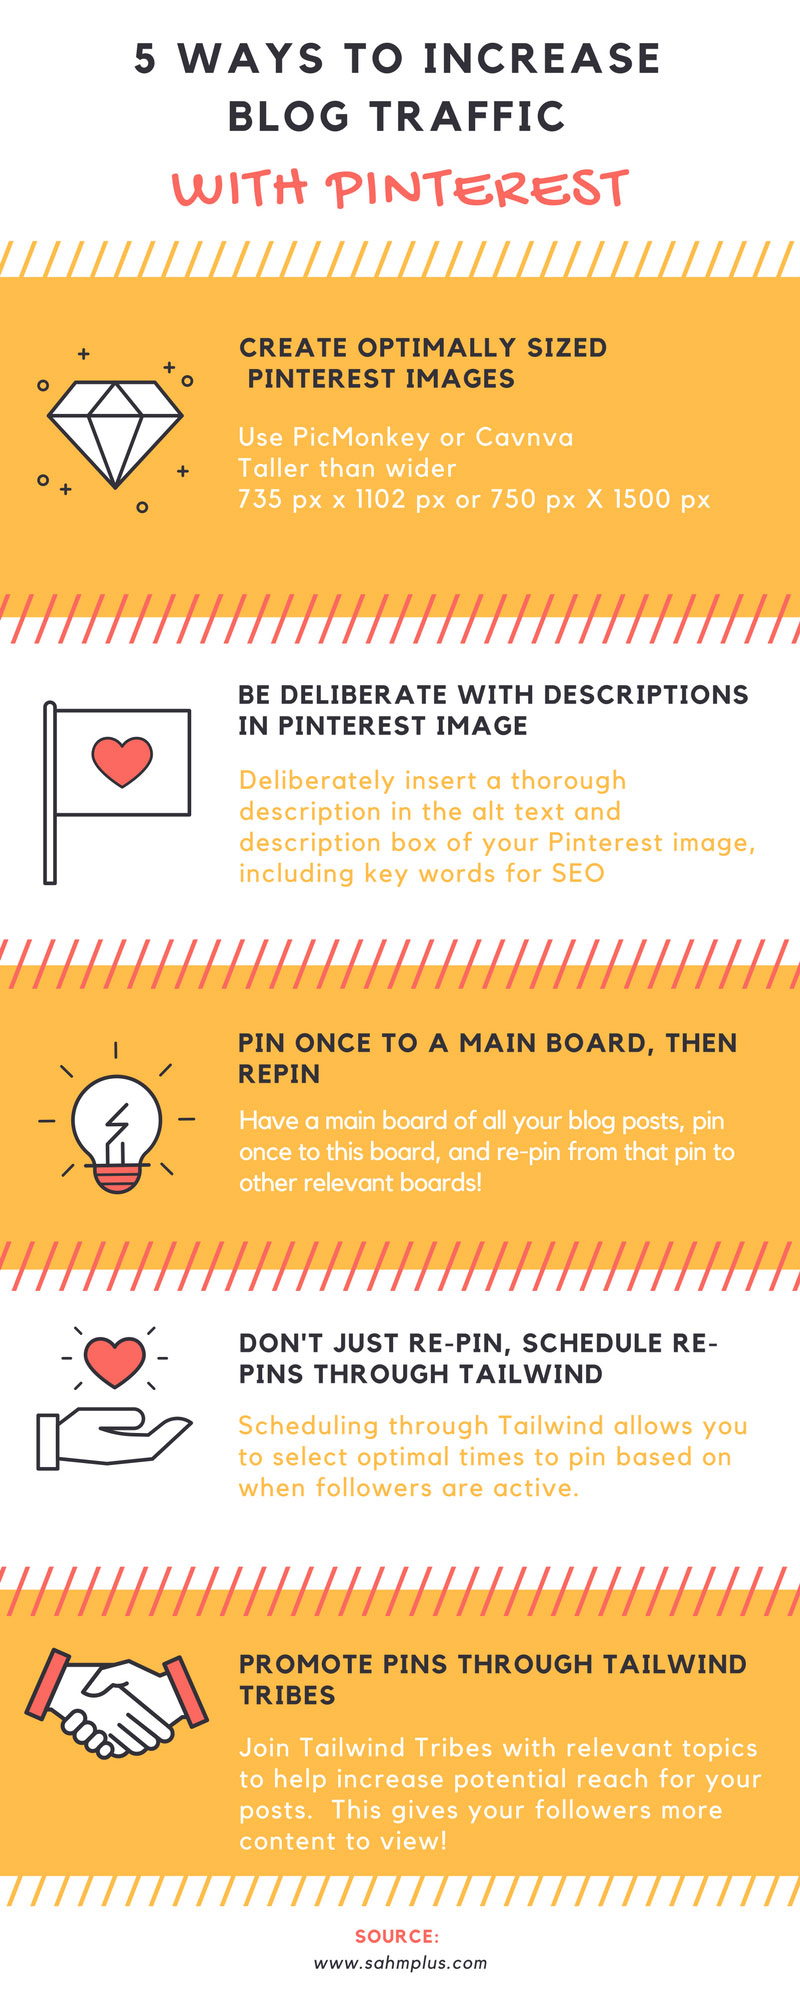
- Your images need to be taller than they are wide. Two recommendations are 725 px X 1102 px OR 750 px X 1500 px. Basically, make your Pinterest images taller than they are wide. I’ve generally been using 725 x 1102 with success, but I continue to experiment with sizing.
- Include a title and your blog name or address. Making sure to include a title and blog name/address on your image will ensure that a) your readers want to know more about the subject and b) where to find it.
- Image file name must be descriptive. Include a key word or the blog post title in the filename of the image. Using a generic filename like dc1002.img does not help with SEO, search, or description for anyone who stumbles on the image. For this post, I would use something like effective-pinterest-marketing.jpg or optimized-pinterest-images.png. If you have multiple pinnable images, name them differently using different key words. For any image, be sure the filename is mostly descriptive of the image itself. You get the point …
Save the image to your workspace.
Save Pinterest Image for Web
This part applies to all images you save for your blog. It’s important you condense your images for web. This:
- Is important for the speed of your website.
- Is important for SEO.
- Saves space on your website.
- Is not resizing the image itself.
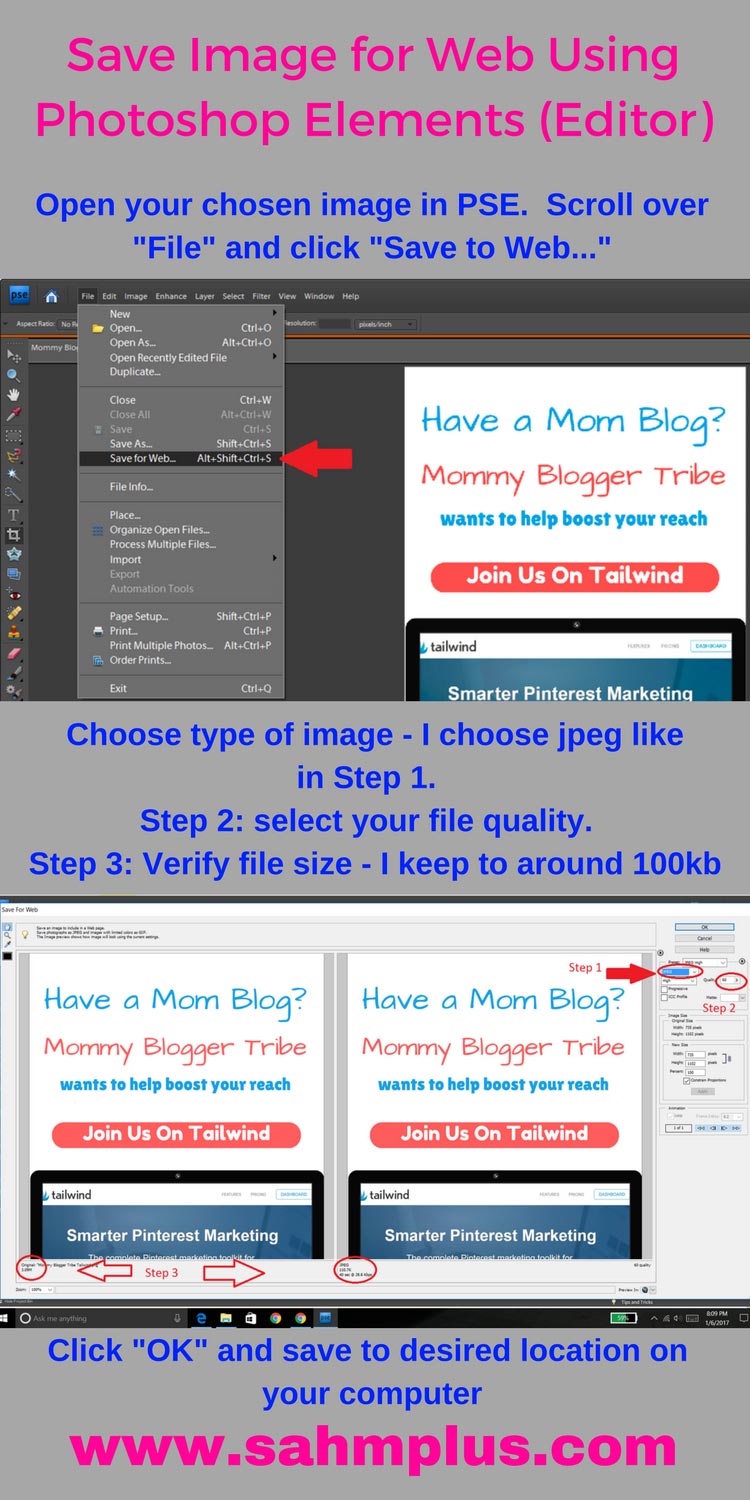
Saving an image for the web is simple. I use an older version of Photoshop Elements, but I can show you how to do that here. I apologize as this is the only software I’ve used thus far. I aim to get the file size just below 100kb. But, I’m probably going to aim to keep them below 200kb for better quality.
[tweetthis]Pinterest & blog traffic: how to save an image for Web[/tweetthis]
Now that you’re done, it’s time to upload your image to your blog post in WordPress. But, you’re still not done. I’ve begun using a free WordPress plug-in called Smush, which helps condense the image further. If you already have it installed, you can upload your image like normal. Then, on the far right you’ll see a “smush” button. Now you can insert the very web friendly image into your post! And, it doesn’t look any different than when you created it.
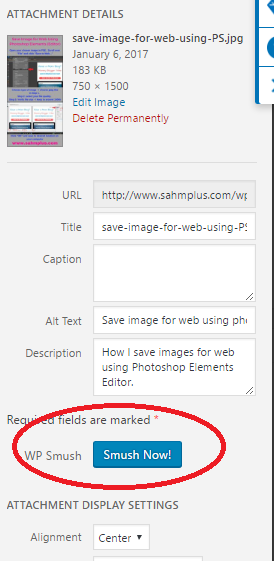
What I love about this plug-in is that you can use it to bulk-smush other images on your site. Of course, if your images were too large to begin with, you’ll need to go back to those and save them for the web, just like you did for this exercise.
Include descriptive text
Now that you’ve uploaded your Pinterest image, it’s time to give it more descriptive text. During the upload of your pinnable (and all other images), be sure to include the alt text (or alternative text) and a longer description in the description box (see the example above where I’m talking about the Smush plug-in. Try to use a couple different ways to describe each image, which opens the possibility of more searchable key words. Giving your images different descriptions will allow Pinterest (and search engines) to pick up data for different sections of your pin.
Skipping any of the descriptive text areas reduces the chances your images are ever found. Plus, if you don’t include descriptions in your Pinterest images, most people won’t take the time to fill in a great description for you. And, you lose valuable re-pins … because who the heck knows what your pin is about.
Set up Rich Pins!
Oh, were you ready to start re-pinning? I swear we’re almost there!
It’s important that you’ve had your website verified with Pinterest. If you didn’t do that, you need to go back to that step. Rich pins are going to fill in much more data than a standard pin. It’s going to have a bold title, more descriptive text, and author data. If you have recipes, it will include ingredients on the pin data. They look much nicer and include more data for your followers or pinners to have a better idea about what they’re pinning. That is, of course, if you’ve set up all your meta-data and included descriptive text in all the fields we’ve discussed.
Now, I don’t want to recreate the wheel here, so I’m going to send you to Socially Sorted, who tells you how to set up Rich Pins in 5 minutes.
Don’t forget to come back here so I can help you with pinning and re-pinning your posts.
Time to Pin Your Posts to Increase Blog Traffic with Pinterest!
Whew! Have you received the all clear that your pins are now Rich Pins? I think I got the approval a couple hours after I applied.
After all that work, it’s time for a little bit of fun! Not all the fun, but we’re so close. Let’s start pinning your posts.
Pick one post right now that you have already optimized your images for. Pin one of your Pinterest images from the post to ONE of your boards. Just one, though! At this point, I prefer to pin my first one to my main blog board with just MY posts. Don’t jump the gun and go re-pinning everywhere.
If you want, you can go through all your posts and pin each image to your main blog post board (if you’ve already optimized the images). Just don’t go and re-pin anything to other boards yet PLEASE! It’s almost time!!!
Time to Re-Pin
This is what you’ve been waiting for. I know how anxious I’ve made you, but I promise, it will be worth it! Let me start by saying that re-pinning from an existing pin is the best way to build your Pinterest numbers. Once I stopped pinning from the image in my post and re-pinning the pin in one of my boards, my numbers began increasing. Best decision ever! Well … second best, right after my pin scheduler!
Best Advice – a Pinterest Pin Scheduler
I use Tailwind, though there are other Pinterest Pin schedulers out there. If you want to re-pin your pins (this really shouldn’t be a question), the best way to do this is through a Pinterest scheduler. Tailwind will automatically select optimal times for rescheduling your pins. This is much nicer than bulk loading your pins to boards. Plus, a scheduler allows you to share relevant pins to your boards to give your readers a lot of content they’ll enjoy.
You can start with Tailwind for free, and if you choose to stick with it, you can pay for the service either monthly or annually. Using my referral link, if you join, you’ll receive a free month of Tailwind. I’ll earn a $15 credit toward my existing account, which is certainly greatly appreciated.
If you choose not to use a scheduler, manually re-pinning your content is going to be a little challenging. Unless, of course, you just want to re-pin the same content all right now. But, that’s not likely going to allow people to see your content any easier. If you have followers already, they’re not going to want to see that you re-pinned all the same content within the last 20 minutes. Heck, that’s even if they’re online checking their notifications.
So, you’ll have to remember what content you have and haven’t re-pinned and try to go back at various times to do them individually. Talk about time consuming needing to track your progress and hoping you remember. Plus, hoping you decided to sit down at optimal times for your stuff to be seen. Plus, scanning through and deciding on other blogger’s content and determining how and when to re-pin.
Bleh. It’s up to you, but I wouldn’t recommend it.
Join Pinterest Group Boards or Tailwind Tribes to Increase Blog Traffic with Pinterest
*Disclaimer: I am a Tailwind Affiliate, but also an avid Tailwind fan! If you join Tailwind with my links, I may earn commission or referral credit, which helps me continue running this site for free!
Some of the best help you’re going to get is to join shared boards or Tailwind Tribes.
Of course, my favorite is Tailwind Tribes, because there is an accountability factor involved. I personally run a Tailwind Tribe, which has a simple 1-to-1 share ratio and if people are leaving pins but not re-pinning, they can be removed. Having been part of a couple collaborative Pinterest boards, I haven’t found that people share quite as often.
Can you guess what else I love about Tailwind Tribes?!?!
I can see who shares my pins and I get to choose the pins that fit best with my brand! Plus, I can schedule straight through the tribe without leaving what I’m doing. I can spend about 20 minutes scheduling enough pins to post automatically for about 2 days (I have tons of time slots in my scheduler, so it takes quite a bit to fill my que). It tracks whose pins I’ve shared, how many times mine were shared, and how many times my shared pins got re-pin outside of the group.
If you can’t tell, I’m really excited about Tailwind.
[tweetthis]Are you a mommy blogger? You can join my tribe…[/tweetthis]
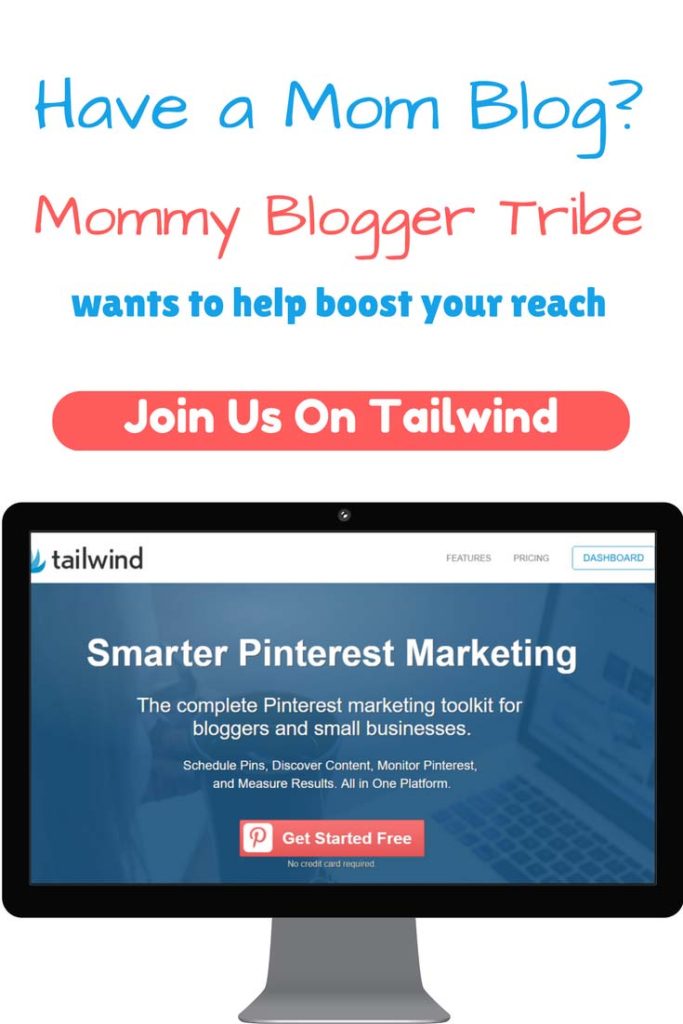
I would love if you would consider joining my Mommy Blogger Tribe on Tailwind. As the admin, it’s my aim to share posts two at least two different relevant Pinterest boards, but I only ever ask that you share one pin for every pin you leave. Bonus points for sharing more! (I’d have to think about what to give out for bonus points …) Joining my Tailwind Tribe is FREE! All you have to do is click the image below! If you decide to sign up for a paid account, you’ll receive a free month of Tailwind and I’ll get a $15 credit toward my existing account. That means I can keep the Tailwind scheduling love going longer!!!
Not a mommy blogger? There are Tailwind Tribes for you. Just join Tailwind here.
Regardless, Tailwind is the perfect scheduler to help you schedule pins at best times. Since I can’t be everywhere as a blogger, scheduling pins is vital to my Pinterest growth and traffic goals.



16 comments
These are great tips! This is the first time I’ve read about the smush widget. I’m going to have to try this.
Belle | One Awesome Momma
I just started using pinterest as a business account and I really like you tips. I need to go back and look at some of the folders I have.
Be sure to check the media you’ve uploaded into WordPress already as well. It’s a bit of work going back, but it’s totally worth it! I’m still working on it!
This has been super helpful! I’ve been trying to up my Pinterest game lately
If you employ any of these techniques, let me know how it goes for you!
Thanks so much for sharing my article about Rich Pins Ivy – great post.
My pleasure! Thanks for making an article that makes sense, and was easy to follow, with no fluff 🙂
Thanks for the great tips Ivy!
I just really started using Pinterest. I’ve seen a little more traffic. I plan on using it more than often.
Such good advice! I actually hadn’t heard of saving/sizing an image for the web. Yikes! Now I’m going to have to check and see what I HAVE been doing, lol. Pinterest is my biggest referrer also.
I hadn’t realized this feature until very recently and knowing that the size slows down my site, I’m going back and “resizing” to try to help. Good luck!
Thanks. I really need to start scheduling my pins. This helps me know where to start!
These are great tips, a few I hadn’t heard before! Great info post!
This is a really great, detailed, and informative post! Thank you so much for taking the time to write it. I’m going to need to come back to it after I work on some much-needed image optimization!
I’m amazed by all this information. I have really been struggling with growing my Pinterest account. I’ve been trying for a few months now, so I’m ready to try something new. Thanks for all the advice!!
These are great tips!! I LOVE pinterest! Even on a off week it’s still my main source of traffic by far!
Comments are closed.